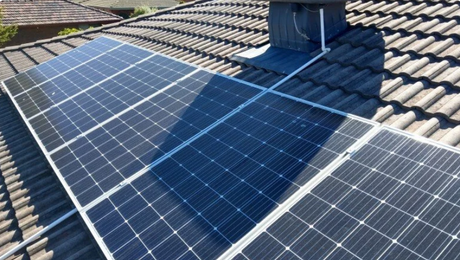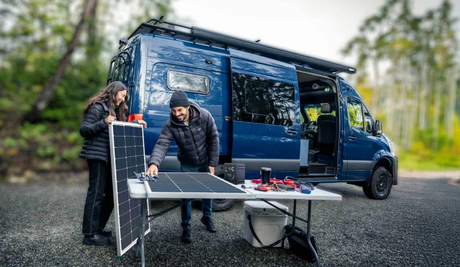


Installing solar panels in Canada is not simply a matter of choosing a panel, mounting it on a roof and connecting an inverter. The right installation path depends on your province or territory, electricity distributor, roof structure, seasonal energy use and winter conditions.
A rooftop system for an Ontario home, an off-grid cabin in British Columbia and a solar setup for a travel trailer are three different projects. Before comparing products, you need to understand which project you are planning, what approvals may apply and how snow, cold temperatures and shorter winter days will affect the system.
This guide takes you from the first site check to final commissioning, with practical advice for homeowners, cottage owners, RV users and off-grid property owners.
Choose the Right Solar Setup in Canada
Start with the job you want the system to do. The same solar panel can be part of a portable battery setup, an RV system or a larger fixed installation, but the wiring, protection equipment and approval process will not be the same.
| Your goal | Typical system | First design priority |
|---|---|---|
| Reduce electricity purchased by a home | Grid-connected rooftop solar | Roof structure, service capacity, provincial permits and distributor approval |
| Power a cottage, workshop or remote cabin | Off-grid solar with batteries | Winter energy production, storage capacity, backup generation and load management |
| Run lights and electronics while travelling | RV or campervan solar | Roof space, vehicle vibration, weight, shade and battery compatibility |
| Keep essential loads running during an outage | Battery backup or a hybrid system | Approved backup equipment, safe grid isolation and a clearly defined load panel |
A portable power station is not the same as a utility-connected rooftop system. Do not connect a portable panel, battery or DIY inverter to household wiring unless the equipment and connection method are specifically designed, certified and approved for that purpose.
Assess Yours for Canadian Conditions
Before you buy equipment, create a one-page site brief. It does not need to be complicated, but it should capture the information an installer or system designer needs.
Record your electricity use
Review your electricity bills and note average monthly and daily use. Identify seasonal loads such as electric heating, heat pumps, hot water, well pumps, vehicle charging and workshop tools. A cottage used only in July has a very different energy profile from a year-round home in a heating-dominated climate.
Measure the usable roof area
Record the roof dimensions, covering, age, pitch and condition. Mark chimneys, vents, skylights, antennas, air conditioners and areas that need service access. Trees and neighbouring buildings can create moving or seasonal shade, so assess the roof at different times of day if possible.
Natural Resources Canada’s Photovoltaic Ready Guidelines also highlight roof structure, conduit routes, electrical-panel capacity and future system planning.
Design for winter before summer
Snow on a solar panel blocks sunlight. A raised rigid panel may be easier to inspect or clear, but it will not automatically shed every snowfall. A flush-mounted flexible panel may be harder to access safely after a storm.
Cold temperatures also affect electrical design. Solar-module open-circuit voltage rises as temperature falls, so a series string must be checked at the lowest expected temperature. Confirm that the charge controller, inverter, wiring and protective devices remain within their voltage and current limits.
For off-grid systems, size the battery and array for the least favourable period you expect to use the property. For a battery-based system using LiFePO4 batteries, check the minimum charging temperature and whether the battery includes low-temperature cut-off or self-heating.
Check roof loading and water management
The design load includes panels, racking, fasteners and accumulated snow. Roof penetrations, cable entries and sealants must also tolerate rain, ice and repeated freeze-thaw cycles. If the roof is nearing replacement, complete that work before installing solar equipment.

How to Install Solar Panels in Canada
Once the system design, roof condition and required approvals have been confirmed, the installation can begin. The exact method depends on whether you are installing rigid panels, flexible panels, an RV system, an off-grid setup or a fixed residential system. Always follow the panel, inverter, charge-controller and RV manufacturer’s instructions.
Step 1: Confirm the layout before mounting
Mark the panel positions before drilling, bonding or attaching any hardware. Keep the panels clear of vents, skylights, antennas, air conditioners and other equipment that may create shade. Leave enough space for inspection, snow accumulation, cable routing and future maintenance.
For Canadian installations, also check the roof’s snow-load capacity, wind exposure and the lowest expected operating temperature. If the roof is damaged or due for replacement, repair or replace it before installing the solar array.
Step 2: Install the mounting system
For rigid panels, attach the brackets or rails to suitable structural points and maintain the required clearance beneath the panels. This air gap can improve ventilation and make the system easier to inspect. Every roof penetration must be sealed using a method compatible with the roofing material and the manufacturer’s instructions.
For flexible panels, confirm the permitted bend radius and make sure the roof material, adhesive or low-profile mounting method are compatible. The roof surface should be clean, dry and free from grease, oxidation, loose coatings and other contaminants. Apply adhesive only within the manufacturer’s specified temperature and curing range. Do not walk on the panel unless the exact model is explicitly rated as walkable.
Step 3: Route and protect the solar cables
Plan the cable route before connecting the panels. Use a weatherproof cable gland or entry system that is suitable for the roof and cable type. Protect cables from sharp edges, standing water, exhaust heat, ice movement, road debris and areas where they may be pinched or rubbed.
Keep connectors clean and dry, maintain the correct polarity and leave enough protected cable length for inspection or future servicing. Do not rely on a connector’s physical fit as proof of electrical compatibility.
Step 4: Connect the solar system safely
Connect the panels to the appropriate charge controller, inverter or hybrid system according to the approved wiring diagram and product manual. Confirm the array’s open-circuit voltage and operating current before energizing the system. Install the required fuses, breakers, disconnects and grounding or bonding equipment.
For battery-based systems, follow the manufacturer’s specified connection sequence. Check the battery voltage, maximum solar input, charging limits and low-temperature protection before connecting the PV array.
Do not work on live solar wiring. Solar panels can produce electricity whenever they are exposed to light. Fixed 120/240 V AC wiring, service-panel changes, grid-connected inverters and utility interconnections should be completed by a qualified electrical professional.
Step 5: Inspect, test and commission the system
Before the system is placed into service, inspect the panel mounting, roof seals, cable entries, connectors and protective devices. Test polarity, voltage, grounding, monitoring and shutdown functions according to the installation instructions.
For a grid-connected system, arrange the required electrical inspection and electricity-distributor approval before energizing or exporting power. For an RV or off-grid system, confirm that the charge controller is charging correctly, the battery-management system reports normal operation and the inverter supplies the intended loads without triggering a fault.
Step 6: Recheck the installation after the first trip or storm
After the first long drive, heavy snowfall or severe wind event, inspect the mounting hardware, roof seals, cable routes and system output. Early checks can identify loose fasteners, water ingress, cable abrasion or unexpected shading before they become major problems.
What Affects Solar Panel Installation Cost?
- System size and panel selection.
- Roof access, roof condition and mounting complexity.
- Snow, wind and structural requirements.
- Inverter, battery and backup equipment.
- Service-panel upgrades and cable distance.
- Permits, inspections and utility-connection work.
- Installation labour and future maintenance.
Before winter
- Inspect mounting hardware, roof seals and cable entries.
- Check for cracked insulation, loose connectors or water ingress.
- Record normal system output so a winter change is easier to identify.
- Confirm battery low-temperature settings and storage instructions.
During snow and freezing conditions
Snow cover reduces solar output. Never climb onto an icy RV or residential roof to clean a panel. If snow removal is recommended, follow the manufacturer’s instructions or arrange professional service. Avoid metal tools that can scratch glass, cut cables or damage panel backing.
Do not assume a panel is producing normally simply because it is cold and sunny. Shorter days, low sun angles, shade and snow can all reduce production. Monitor the system and investigate sudden changes safely.
In spring
Inspect for damage caused by ice movement, freeze-thaw cycles, wind and fallen branches. Check roof penetrations, mounting points, connectors and cable routes before the next travel or camping season.
Common mistakes to avoid
- Choosing panels before measuring usable roof space.
- Ignoring snow load, shade or low-temperature voltage.
- Using a generic adhesive or sealant on an RV roof.
- Mixing panels with different voltage or current characteristics without checking the system design.
- Assuming a U.S. product approval automatically applies in Canada.
- Using outdated rebate or export-credit information.
- Attempting fixed AC wiring, service-panel work or grid connection without qualified assistance.
FAQs
What is the average lifespan of Canadian solar panels?
The average useful lifespan is usually around 25 to 30 years.
Do I need to replace my roof before installing solar panels?
Not always, but if your roof is old, leaking, or likely to need replacement within the next 10–15 years, it’s usually best to replace it before installing solar panels. Panels typically last 25–30 years, and removing and reinstalling them later adds significant cost, labor, and leak risk.


![Which Marine Battery is Right for You [2026 Guide]](http://ca.renogy.com/cdn/shop/articles/how-to-choose-marine-battery_5af35244-b269-4d22-8ef2-af84d70386ed.png?v=1777428541&width=460)