


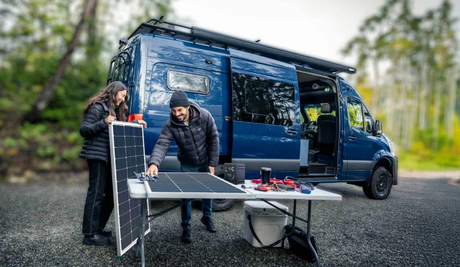
How to Install an RV Solar Kit | Canada Comprehensive Guide
You've made the switch to solar. Great choice! But now the box is sitting in your garage, and you're wondering: how do I actually install a solar kit? Don't worry....


12V 30/50A DC-DC On-Board Battery Charger with MPPT - 50A / Battery Charger Only is backordered and will ship as soon as it is back in stock.


12V 30/50A DC-DC On-Board Battery Charger with MPPT


Charge with advanced logic and 'Low Solar Cutoff Mode' for optimal performance in all weather conditions.


Consistent high efficiency in extreme temperatures with precise battery temperature compensation.

The all-in-one NEG-terminal design consolidates connections for the solar panel array, starter battery, and house battery, optimizing installation space and simplifying setup.

This battery charger offers advanced intelligent protections for batteries, solar panels, and the alternator, delivering a secure and efficient charging experience while safeguarding your system components.

The soft start circuit gradually increases the charger's input voltage, preventing sudden overvoltage and over-discharge.

Reverse current protection prevents potential damage caused by reverse charging from the battery to the solar panels at night, ensuring system safety and reliable performance.


12V 50A DC-DC Dual Battery Charger

Battery Temperature Sensor

Battery Voltage Sensor

IGN Signal Wire
Electrical Parameters
Certifications
Warranty


Renogy
12V 300Ah LiFePO4 Battery w/ self-heating function | Core Series


Renogy
ShadowFlux™ 100/195W N-Type High Efficiency Anti-Shading Solar Panel


Renogy
12V 200Ah LiFePO4 Battery w/ Bluetooth | Core Series


Renogy
200/400W N-Type Portable Solar Panel Blanket


Renogy
Mini Size 12V 100Ah/200Ah/300Ah LiFePO4 Battery


Renogy


Renogy
100/300W N-Type Lightweight Portable Solar Panel Suitcase

Renogy
Mini Size 12V 200Ah Lithium Iron Phosphate Battery w/ Low-Temperature Protection
You've made the switch to solar. Great choice! But now the box is sitting in your garage, and you're wondering: how do I actually install a solar kit? Don't worry....
![Which Marine Battery is Right for You [2026 Guide]](http://ca.renogy.com/cdn/shop/articles/how-to-choose-marine-battery_5af35244-b269-4d22-8ef2-af84d70386ed.png?v=1777428541&width=460)
A good marine battery will ensure a safe, reliable, and fun sailing experience on your boat. The right battery will power the navigation system, communication system, lighting, refrigeration, and electronics....

This Christmas, give more than just a gift—give a sense of possibility. Think of offering someone you care about the freedom to explore, the reassurance of backup power, and the...

Black Friday is on the horizon! For anyone dreaming of energy independence, whether for your RV, marine, cabin, or home, this is the most anticipated event of the year. Renogy...
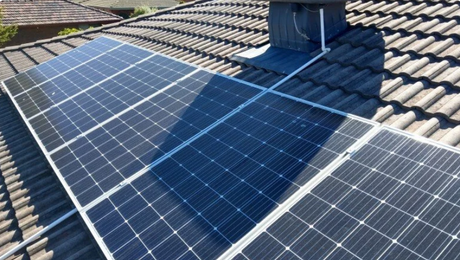
A single leaf, a small branch, or even the shadow of a chimney falls across your solar panel. The overall system's power output drops instantly. This frustrating shading issue has...
There's nothing more frustrating for an RVer than waking up to a cloudy day. While the weather might pause your outdoor plans, the real concern is your solar panel energy...

The demand for solar energy is increasing day by day across the world, including Canada. The major reason behind its rising demand is that it generates electricity without producing air...

Though disconnecting a car battery is simple, and you don't necessarily need to visit a technician for this purpose, not all can perform this task effectively. Whether you want to...


Amp
Bundle Options