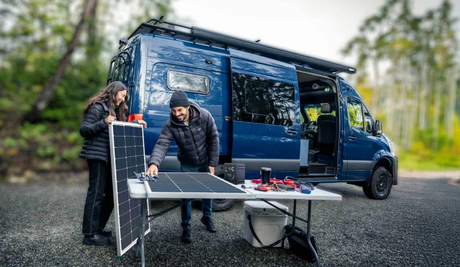
You've made the switch to solar. Great choice! But now the box is sitting in your garage, and you're wondering: how do I actually install a solar kit?
Don't worry. This guide is written for real people, not just engineers. Whether you have a motorhome, a camper van, a tiny home, or even a shed, you'll learn how to install a solar panel kit safely and get it working right the first time.
We'll use the Renogy 7.6kWh The Go Further Solution as our example, but the same steps apply to most solar kits. Let's get started!
What to Do When You Receive Your Solar Kit
Before you grab any tools, take a few minutes to unpack everything carefully.
Check off each component
Your solar kit should include:
- 2 × 195W Shadowflux Solar Panels
- 2 × 300Ah Mini Size LiFePO4 Batteries
- 1 × 50A DC-DC MPPT Battery Charger with MPPT
- 1 × 3000W Pure Sine Wave Inverter with UPS Transfer Switch
- Battery shunt, inverter switch, cables, fuses, and busbar
👉 Lay everything out on a clean floor or table. Use the packing list in the manual to verify you have all parts.
Inspect for damage
Look closely at the solar panels, make sure there are no cracks, chips, or scratches. Then move on to the battery cases and check for dents or leaks. Make sure all cables have clean, undamaged connectors.
If you find anything missing or broken, take a photo of the issue and contact Renogy support right away. They'll help you sort it out quickly.
Solar Kit Installation Preparation
If you want to learn how to install a solar panel kit the right way, start with the wiring diagram. Every quality solar kit includes one on its product page. You'll see a simple flow:

Tools you'll likely need
- Drill and drill bits
- Screwdrivers (Phillips and flathead)
- Wrench set
- Wire strippers / cutter
- Ground Fault Circuit Interrupter (GFCI)
- MS Adhesive and MS Applicator Gun
- Cables
⚠️ Safety first
- Wear insulated gloves and safety glasses
- Use insulated tools
- Disconnect any existing battery before you start
- Work in dry weather
Step-by-Step Solar Kit Installation
Follow the manual's recommended sequence. The order matters for safety and proper functionality.
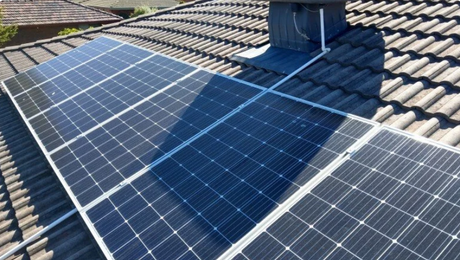
1. Mount the Solar Panels
Use the included Z-brackets to secure the two 200W solar panels to your RV roof.
- Measure and mark positions, avoiding vents, AC units, and shaded areas
- Pre-drill pilot holes, apply sealant, then screw down the brackets
- Attach panels to the brackets securely
2. Drill the Wire Entry Hole
If your RV roof doesn't already have a pre-drilled wire hole:
- Use the entry gland as a template to mark the hole location
- Drill carefully through the roof
- Run the adapter cables through the hole
- Seal thoroughly with the included MS adhesive
- Important: Wait for the adhesive to fully cure before moving or disturbing the gland
3. Connect the Battery Bank to the Busbars
This is the foundation of your electrical system:
Negative connections:
- Connect both battery negative terminals together
- Connect battery B's negative terminal to the shunt's B− terminal
- Connect the shunt's P− terminal to the 300A black busbar
- Attach the shunt's T1 temperature sensor to the battery casing
Positive connections:
- Connect both battery positive terminals together
- Run from battery A's positive terminal → 400A ANL fuse → 350A battery switch → 300A red busbar
- Connect the shunt's B1 terminal to battery A's positive terminal

4. Connect the Battery Charger to the Busbars
- Connect the charger's NEG− terminal to the 300A black busbar
- Connect the charger's OUT+ terminal → 80A ANL fuse → 300A red busbar
5. Connect the Battery Charger to the RV Starter Battery
This enables bidirectional charging while driving:
- Run a user-supplied cable from the starter battery negative to the 300A black busbar
- Connect the charger's ALT+ terminal → 80A ANL fuse → starter battery positive
- Connect the shunt's B2 terminal to the starter battery positive

6. Connect the Solar Panels to the Charger
- Connect both panel positives to the positive Y-branch connector
- Connect both panel negatives to the negative Y-branch connector
- Route the negative Y-branch to the 300A black busbar
- Route the positive Y-branch → 30A solar fuse → charger's PV+ terminal
7. Install the Bluetooth Module
Plug the BT‑2 Bluetooth module into the battery charger's RS485 port. This allows you to monitor charger status through the Renogy App.
8. Ground the Inverter
Prepare a 10 AWG grounding cable (user-supplied). Connect one end to the inverter's grounding terminal and the other end to the vehicle's metal frame. Scrape off any paint to ensure good conductivity.
9. Install the Remote Switch
- Set the switch to the REM position
- Insert one end of the wired remote cable into the remote switch
- Insert the other end into the inverter's REMOTE port
10. Connect the Inverter to the Busbars
- Connect the inverter's DC− negative terminal to the 300A black busbar
- Connect the inverter's DC+ positive terminal → 400A ANL fuse → 350A inverter switch → 300A red busbar
11. Final Power‑Up Sequence
Follow this exact sequence to avoid damage:
- Before turning anything on, double-check all connections are secure
- Cover the solar panels' light-facing surface
- Turn on the battery switch first
- Remove the solar panel covers
- Turn on the inverter switch
- Test a small AC load to verify operation
Critical Safety Rules of Solar Kit Installation
- Always connect negative terminals before positive terminals
- Connect the battery before connecting solar panels — never the reverse
- Ground the inverter properly — this prevents electric shock and complies with electrical codes
- Keep all switches in the OFF position until all wiring is complete
- The primary charging method for this system is alternator charging via the DC‑DC charger, not solar alone
What to Do After Installing Your Solar Kit
Do
- Clean the solar panels with water and a soft cloth every few months.
- Check roof seals and the entry gland for cracks twice a year.
- Use the Renogy app to monitor battery state of charge and history.
Don't
- Don't add extra solar panels without checking the charge controller's max voltage.
- Don't disconnect the battery while the sun is shining on the panels – it can cause a voltage spike.
- Don't run heavy AC appliances (like an air conditioner) unless you know your 3000W inverter can handle the surge.
Need Help? Renogy Support Is Here
You're not alone. If you get stuck or something doesn't look right:
- Contact Us: Renogy Customer Service
- Email: supportca@renogy.com (for the CA)
- Phone: 1(909)287 7111
- Submit a Case: Link here
Final Thought
Installing a solar kit for the first time can feel like a big project, but every successful off-grid setup started with someone taking it one step at a time. By following this guide, you've already learned how to install a solar kit the right way – from checking your components and understanding the wiring flow to safely connecting your busbars and avoiding common mistakes.
The Renogy quick guide is an excellent reference, so keep it handy. Now, go enjoy the freedom of your own off-grid power. Whether you're in an RV, a cabin, or a backyard shed, you'll appreciate every watt you generate. ☀️


![Which Marine Battery is Right for You [2026 Guide]](http://ca.renogy.com/cdn/shop/articles/how-to-choose-marine-battery_5af35244-b269-4d22-8ef2-af84d70386ed.png?v=1777428541&width=460)