If you’re looking for a self-build RV wiring diagram that works in Canada, you’ve found it. This diagram represents one of the most common setups in Canada and it is designed for a 2kWh solar power system, which is sufficient for a couple’s or two friends’ journey.

Campervan wiring diagram from Renogy
It can be broken down into three categories: Sources, AC power, and DC power.
Note: You need to understand this diagram fully! You also need to know how electrical wiring is installed. If you’ve never done this sort of work before, you need to take electrical safety and wiring courses first.
RV Wiring Diagram - The Sources
There are four sources of power that you need to consider: Solar power, lithium batteries, the RV’s starter battery, and shore power.
This diagram is for people who want to go fully off grid. If that’s not your situation, you’re going to want to add a 30A Shore Power Inlet kit with a 50A adapter to the mix, or a 50A Shore Power Inlet with a 30A adapter. A 15A/20A home adapter is also something to consider.
To hook up Canadian shore power, replace the pictured inverter with an inverter-charger instead. The wiring diagram for it is in the manual. This will let you charge the batteries from an AC shore source, switching seamlessly from shore power to solar as required.
Why not just add shore power capability by default? Off grid systems are cheaper, simply put. And not everyone is interested in using campgrounds.
Notice that each connection runs through the bus bars. And every connection either has a fuse, a fuse box, or killswitch on the positive side. The bus bars are how you regulate and mix power flows, and everything flows through them. That’s a lot of power in a compact system. So fuses are simply best practice.
RV Wiring Diagram - The DC Power
The first source of DC power is your solar panels and your starter battery. Power flows into your 50 Amp battery charger. A full installation video for the charger can be found here. Make sure you set the correct battery type by pressing the battery type button until the right color is displayed. Then wire it up as shown above.
The positive output from your 50A DC-DC runs through the 60A fuse, and then to the positive bus bar.
The second source of your DC power is your solar batteries. The best battery type for a Canadian RV is lithium. Because you’re likely to have near-full or complete battery discharges, older battery types (which lose lifespan after being taken under 50% charge) are inefficient.
The smart lithium iron phosphate batteries are connected in series: Positive to nagative and negative to positive in a long chain. The red positive power lead coming from the battery’s kill switch should be connected to the negative terminal of the first battery in the series. The black negative power wire connecting back to the negative bar needs to be attached to the terminal terminal of the last battery in the series.
With your DC circuit prepared, you can hook up your DC fuse box. Positive and negative connections for the box itself go directly to the appropriate bus bars. Then each fuse is assigned to the appropriate DC function: DC Lighting, DC refrigerator, etc. Check the individual manuals for these products to see which fuses are appropriate.
Your remaining DC power needs to be converted to AC for the rest of your gadgets. A pure sine wave inverter is hooked up to the positive and negative bus bars, as appropriate. The massive 250A fuse is on the positive connection. One of the most common sources of RV electric fires is improper safety precautions (lack of fuses, inappropriate fuses, wrong gauge wires, etc.). Make sure you use fuses!
RV Wiring Diagram - The AC Power
AC can be drawn from the sockets on the back of your pure sine wave inverter. The rating on your inverter has to exceed all possible inputs from variable power sources - like your total solar panel output! And the output of all other DC sources needs to either be regulated and limited, or added to the total power figure that the inverter can handle.
After making that calculation, you can start hooking up your AC electric devices to the pure sine wave inverter. Don’t use more than one extension cord or power strip per outlet. And power strips must have working fuses!
Use a solar powered calculator to make sure that your power needs don’t exceed your limits. You can also use it to estimate how much power you can draw from the batteries between charges.
Make sure that each device has a working fuse or that it’s connected to a power strip with a working fuse. Conduct the appropriate portable appliance testing (PAT), since there are regulations that need to be followed in Canada
Miscellaneous Features
Two Bluetooth modules are used for monitoring battery status, battery charging, and solar panel output.
Download the correct battery status app to help you ‘budget’ your power consumption between charges.
The solar production app helps you optimize solar panel positioning, parking location, and estimate how much power you have left. During the summer, peak sun hours in Canada range between 3 and 4.5. During the winter, it is closer to 2 hours in most locations.

The battery killswitch is an important feature. It completely cuts off the battery from the positive bus bar. That means nothing can charge the solar batteries, and the batteries can’t contribute to your power needs. If anything goes wrong due to overheating, unexpected surges, or physical battery damage, the killswitch is there to protect you and other components in your RV’s electrical system.
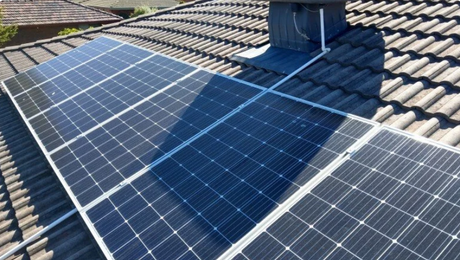
There are other options available on Renogy store if you prefer rigid solar panels. A series of 200W rigid panels can be more efficient, as far as your RV’s roof space is concerned. But they’re heavier than flexible versions. Still, if you’re trying to generate the maximum amount of solar power per square meter, rigid panels are a consideration.
Any Simpler Camper Electrical Wiring Solution?
Typical RV electrical wiring operation involves safety risks and requires preparation for electrical knowledge beforehand. For people who are new to RV life and without any electrical knowledge, it is harder for them to set foot in the DIY wiring process. Even for a seasoned electrician , it can still take at least four hours to complete the work. But things will change with Renogy’s REGO system.
The newly launched REGO system can simplify four hours’ labor into 15 minutes. Isn’t it amazing? Before we show how they form the RV power system, let’s have an overview of what it is. The REGO is a collection of an MPPT charge controller, Renogy ONE monitor, DC-DC battery charger, 400Ah Lithium battery, system combiner, battery combiner, and inverter charger.

REGO collections
The system has all the key components needed in an RV electrical system covered, so you don’t have to purchase each component separately. If you have no relevant knowledge of how to turn your van off-grid with a solar power system, you’ll need to spend a large amount of time doing the research and make purchases. That’s only one of the advantages of using the REGO system.
There are more reasons you will fall in love with the system:
- *Easy installation with Anderson adapters and cable collectors
- *High battery storage capacity
- *Smart monitoring system with built-in Bluetooth modules and RV-C communication protocol.
- *Anti-reverse connections
- *Support three battery charging methods: solar/shore power/vehicles
- *Fast charging technology
- *Compatible with products from other brands
- *Five-year warranty
- *And more.
What are Anderson adapters: They are physically and electrically hermaphroditic, which means no worries about mixing the plug end and the socket end as they work the same.
RV Wiring Diagram with the REGO system

You can replace most of the key components including the monitoring gadgets and most wires in a typical RV wiring diagram with the REGO system. That will save you a lot of effort as well as wiring problems. Smaller parts like battery switches, bus bars, fuses, cable entry housings, solar connectors, and fuse blocks are not included in the REGO system, but you can still buy most of them on the Renogy store.
- Solar Connector Waterproof in-line Fuse Holder w/Fuse
- Solar Y Branch Connectors MMF+FFM Pair
- Solar Panel to Charge Controller Adaptor Kit
The REGO system is the best option for new RVers or RV campers who would like to have their old wiring system replaced. With the system, you don’t need to purchase key accessories like charge controllers, inverters, and batteries separately through calculation and comparisons. Moreover, you don’t have to worry about compatibility issues and buy extra conjunction accessories.
Best of all, if you don’t want to invest in a complete system, they can be sold separately. Each of them is compatible with components from different manufacturers. Currently, only the MPPT charge controller, lithium battery, and battery charger are available in the Canadian market.
- 30A MPPT Charger Controller
- REGO 12V 60A MPPT Solar Charge Controller
- REGO 12V 400Ah Lithium Battery
- REGO 3000W Inverter Charger
- REGO 3 Port 400A Battery Combine Box
- REGO 500A Combiner Box
Keep tuned with any information of other components of the REGO system in Canada by following Renogy on social media, or contact us for more.
Related articles:
Exploring The Advent Of Solar Panels In Ontario
Are Solar Panels For Home Worth It In Canada?
What Is An Inverter And How Does It Work In An RV?


![Which Marine Battery is Right for You [2026 Guide]](http://ca.renogy.com/cdn/shop/articles/how-to-choose-marine-battery_5af35244-b269-4d22-8ef2-af84d70386ed.png?v=1777428541&width=460)