When dealing with harsh Canadian weather and the sometimes hostile sailing conditions found so far north, having the right boat battery is essential.
You can’t just pop down to the garage to pick up all of your boat batteries. Like everything else on your boat, your battery bank has to have the right tools for the job.
So let’s drill into the process of adding or replacing a marine battery that is appropriate for a climate such as in Canada.
Table of contents:
- What is a boat battery bank?
- How to add a boat battery to your battery bank
- How to replace a marine battery in your battery bank
- Maintaining and charging your boat battery
- Getting help with your boat battery planning
What is a boat battery bank?
You may notice that we’re always talking in terms of a boat’s ‘battery bank’. What exactly does that mean?
A battery bank is a secure spot where all of the boat’s energy storage is housed. If your boat only has one battery, you might want to rethink your maritime electrical situation. Why? Because the battery that you use to start your boat is awful at powering devices!

The first battery in your bank is the boat’s cranking battery, also known as a starter battery. This battery has a reliable, high rate of discharge that specifically starts the motor. Running devices offthis battery will kill its lifetime and reduce its effectiveness. Given how critical the cranking battery can be to survival, it should be a completely separate entity, specially designed to get your motor running in the harshest of conditions.
The second battery in your bank is the house battery, also known as the running battery. The house battery is meant to run the various devices onboard. Normally we’re talking about a 12V deep cycle battery, though if you have heavy winches or serious bilge pumps to run, it might be a 24V setup. (Click here for more about What is a deep cycle battery.)
The battery bank might also have an emergency switch that lets you use the house battery as a starter in times of emergency. You can also switch the leads over manually if it comes to that.
The best place for a battery bank is kind of a toss-up. On the one hand, batteries can be heavy, so keeping them as low as possible will help with stability in rough seas. On the other hand, you want to keep them as safe and dry as possible, and provide proper ventilation. The rule of thumb is aft and low, somewhere near the engine compartment. But keep them away from openings, bilges, and kitchens.
How to add a boat battery to your battery bank
There are two main scenarios that might have you adding a marine battery to your battery bank:
Scenario 1: You only have a cranking battery and you want to separate out the power used by everyday devices.
Scenario 2: You need more capacity or more voltage for your existing house battery.
Scenario 1 - Adding a house battery
Right now, everything on your boat is hooked up to the starter battery, and that’s not ideal. So let’s add a deep cycle house battery to the mix for more safety and reliability, and to open up the possibility of things like flexible solar panels in the future.

Note: In a twin-engine setup, you probably have two identical starter batteries. Don’t let that throw you. The instructions are basically the same as far as removing the everyday trunk from your current battery set, but you won’t use a switch to make the deep cycle your backup crank. More than likely, you already have a switch that lets crank one and crank two back each other up.
Make sure that you take all proper precautions when working with electricity. Once you turn everything off so that you can work on the electrical system safely, you’re going to look at the wiring coming into the current solo battery. There should be one wiring trunk that has all of the everyday devices, and a direct connection from the battery to the motor.
Disconnect the trunk that has all of your everyday devices, and leave the cranking battery hooked up to the motor exclusively. If you want an easy way to failover your new battery as a starter, install a four-position boat battery switch. Instructions will come with the boat battery switch. Still, you’ll be wiring the crank battery to position ‘1’, the deep cycle battery to position ‘2’, and you’ll only be using the ‘1+2’ position to join them if literally nothing else has worked.
Now add the deep cycle battery to your battery bank. You want to use a Smart Lithium-Iron Phosphate battery for your deep cycle option. If you take long trips or use a lot of appliances, the 200Ah version is cheaper than hooking up two smaller ones. If you’re further north or heading up towards the colder stretches, the self-heating version is a good shout.
If you have the four-position boat battery switch, wire the deep cycle up to position ‘2’ as a backup starter. Either way, you’ll connect the everyday trunk up to the new battery. It’s much better suited to the constant charging and recharging that you’ll need for running appliances and utilities.
This is a fairly simple scenario, but in a properly wired boat it should really be that easy! That’s because the fuses, bus bars, circuit breakers, and everything else should be ‘downstream’ of the battery setup.
What do we consider ‘properly wired’? New Wire has one of the best boat wiring diagrams you’ll ever see. It’s simple, effective, and explains the setup of most four-position switches even if yours didn’t come with a manual.
Scenario 2 - Increasing your house battery capacity
If you need serious juice, you may need to add a second or third (or more) boat battery to your already existing deep cycle bank. We suggest using identical models, so if you’re already using a high-capacity 200Ah Smart Lithium-Iron Phosphate battery, get another one (or more) of those. If you need the self-heating version, you can just create an array of the 100Ah batteries.
Determining your capacity depends on the size of the vessel and the appliances that you’re running. It also depends on how reliant you are on power usage, whether or not you’re using solar as a recharge mechanism, and how often you get back to shore.
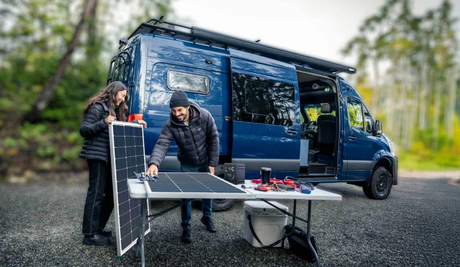
The best place to start is with an appliance calculator. If you plug in the devices you use on a daily basis, factor in how many days you stay out, and consider adding a little bit of an emergency threshold on top of that (at least 25% more is wise), you’ll come up with the right figure. These days, with solar getting cheaper and fuel getting more expensive, more people are turning to electrical (photovoltaic) solar panels to stretch their battery usage further.
For example, let’s say you go out for two day stretches (48 hours). You have an A+ rated mini fridge (300 Wh a day), a small sump (100 Wh a day), a laptop you use for around 6 hours a day (600 Wh), a smartphone (25 Wh a day), a rice cooker you use every other day (100 Wh), a microwave you use for 10 minutes a day on average (200 Wh), and miscellaneous LED lighting, communications, and navigation gear use periodically (250 Wh). Assume you use bottled gas (LPG) for cooking, heating, and boiling water.

For a two-day stretch, you’re looking at around 3 kWh energy usage. You want to size 25% above that for good measure. That would be a total of four 12V 100Ah batteries (at 1.2 kWh each), or two 12V 200Ah batteries (at 2.4 kWh each).
Use the appliance calculator and your specific product information to come up with your own estimate. Now that you know your total boat battery capacity, you can buy and install them.
The extra boat battery should be mounted as close as possible to the current deep cycle battery. You’ll be connecting them in parallel - positive terminal to positive terminal, and negative terminal to negative terminal. The cross-links should be professional grade, with the proper gauge wire for your amperage. We suggest that you crimp the battery terminals, assuming this is a long-term setup! If you don’t have a heavy duty crimper and the right terminals, having this part done by a professional is certainly an option. If you choose not to crimp, make sure that all of the connections are tight and properly capped at a minimum.
Why parallel? Because if you connect your boat batteries in series, you will increase maximum voltage, not capacity. And that’s fine if it’s your goal, but make sure that all of the fuses and circuit breakers in your system are rated for this new setup.
If the reason you’re adding more capacity is to charge effectively off of flexible solar panels, you aren’t done yet. Skip to the ‘ Maintaining And Charging Your Boat Battery’ section for more details.
How to replace a marine battery in your battery bank
As regrettable as having to replace a battery is, this is the simplest procedure we’re going to talk about.
As a rule of thumb: Replace like for like, or optionally upgrade capacity. If you plan to upgrade voltage/amperage by buying a more powerful unit or installing boat batteries in series, you’ll need to make sure the rest of your electrical system can handle it.
Make sure you turn off all electrical devices before installing your replacement boat battery and that there’s no power flowing through the system. Take all proper precautions while working with electricity.

Assuming your battery bank has the space, there’s no issue replacing a 100Ah Smart Lithium-Iron Phosphate battery with a 200Ah version at the same voltage. Just make sure that if it’s part of a bigger storage array, connect your replacement boat battery in parallel: Positive to positive, and negative to negative.
Maintaining and charging your boat battery
Your cranking battery should recharge automatically with a modern boat motor using an alternator or starter. If it’s an older or simpler motor, you’ll want to pay attention to the charge level and make sure you charge it up when you get back to shore, assuming you have the right kind of charge controller to do that. Otherwise you’ll be using a generator or charge kit to top up your cranking battery periodically.
There are a few ways to solve the problem of “how to charge a boat battery”.
The first is to use a 12V AC to DC plug-in charger or a 24V AC to DC plug-in charger when you’re on shore power. If you have DC to DC charging available, there are a variety of other products you can use.
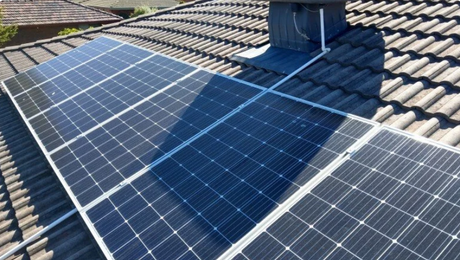
Another way is to charge your boat battery using solar power. You are going to want a charge controller and some flexible solar panels for maritime use. The solar runs through the controller (preferably through a correctly rated breaker or fuse), and then into your house battery bank. Being further north than most, Canadians get fewer peak sun hours than folks closer to the equator. Still, three solid hours of direct sunlight to a pair of 170W 12V panels will produce around 1 kWh of energy (170 Watts * 2 panels * 3 hours = 1.02 kWh). That’s enough to 80% fill a single 12V 100Ah Smart Lithium-Iron Phosphate battery.
So while you’re at the mercy of the sun for that extra charge, solar can be one heck of a lifeline if things go south and you find yourself without power.
Getting help with your boat battery planning
If you have more questions about sizing, installing, or replacing your boat battery, talk to the professionals. Renogy eats, breaths, and sleeps in the world of power consumption. Just contact us and we’ll be happy to answer your battery, solar, and off-grid planning questions as well as help you select the gear that’s right for your particular situation.
Related articles:
How Do Solar Panels Work: Things You Should Know
How to Add a Backup Battery to an Existing Grid-Tied Solar System
Do I Need a DC to DC Battery Charger?


![Which Marine Battery is Right for You [2026 Guide]](http://ca.renogy.com/cdn/shop/articles/how-to-choose-marine-battery_5af35244-b269-4d22-8ef2-af84d70386ed.png?v=1777428541&width=460)